Firebase 整合
基本設定
1. Firebase Key
Firebase Key 可以在撰寫 canner.schema.js 的時候,利用 CannerTypes 去設定,第一層 key 都可以有自己獨立的 Firebase 資料庫只要給予設定檔即可。
設定 Firebase Realtime Database endpoint,使用 CannerTypes.endpoint('firebase', config);
1 2 3 4 5 6 7 8 9 10 11 12 13 14 15 16 17 18 19 20 21 22 23 24 25 26 27 28 29 30// setup the default firebase configuration to firestore, `firebase` tells the CMS connect to your firestore endpoint const page1 = CannerTypes.object({...fields}) .title('page1') .description('the info of the page1 page') // page1 key will read this endpoint .endpoint('firebase', { // Firebase configuration, these data can be found in project overview in firebase apiKey: "API KEY", authDomain: "AUTH DOMAIN", databaseURL: "DATABASE URL", projectId: "PROJECT ID", storageBucket: "STORAGE BUCKET", messagingSenderId: "MESSAGING SENDER ID" }); const page2 = CannerTypes.object({...fields}) .title('page2') .description('the info of the page2 page') // page2 key will read this endpoint .endpoint('firebase', { // Firebase configuration, these data can be found in project overview in firebase apiKey: "API KEY", authDomain: "AUTH DOMAIN", databaseURL: "DATABASE URL", projectId: "PROJECT ID", storageBucket: "STORAGE BUCKET", messagingSenderId: "MESSAGING SENDER ID" }); module.exports = {page1, page2};
但在大部分的情況下你可以使用 CannerTypes.endpoint 這個方法設定預設的 Firebase,任何沒有獨自設定的 key 都會採用預設的設定檔。
1 2 3 4 5 6 7 8 9 10 11 12 13 14 15 16 17 18 19 20 21 22 23 24 25 26 27 28 29 30 31 32 33 34 35// 這是預設的設定檔 CannerTypes.endpoint('firebase', { // 這些設定可以在 firebase 的專案總覽找到 apiKey: "API KEY", authDomain: "AUTH DOMAIN", databaseURL: "DATABASE URL", projectId: "PROJECT ID", storageBucket: "STORAGE BUCKET", messagingSenderId: "MESSAGING SENDER ID" }) // home 會採用上述預設的 Firebase const home = CannerTypes.object({...fields}) .title('首頁') .description('設定首頁的資訊'); // about 會採用自己的 Firebase const about = CannerTypes.object({...fields}) .title('關於我們') .description('設定關於我們的資訊'); .endpoint('firebase', { // these data can be found in project overview in firebase apiKey: "API KEY2", authDomain: "AUTH DOMAIN2", databaseURL: "DATABASE URL2", projectId: "PROJECT ID2", storageBucket: "STORAGE BUCKET2", messagingSenderId: "MESSAGING SENDER ID2" }); module.exports = { home: home, about: about }
2. 下載私密金鑰
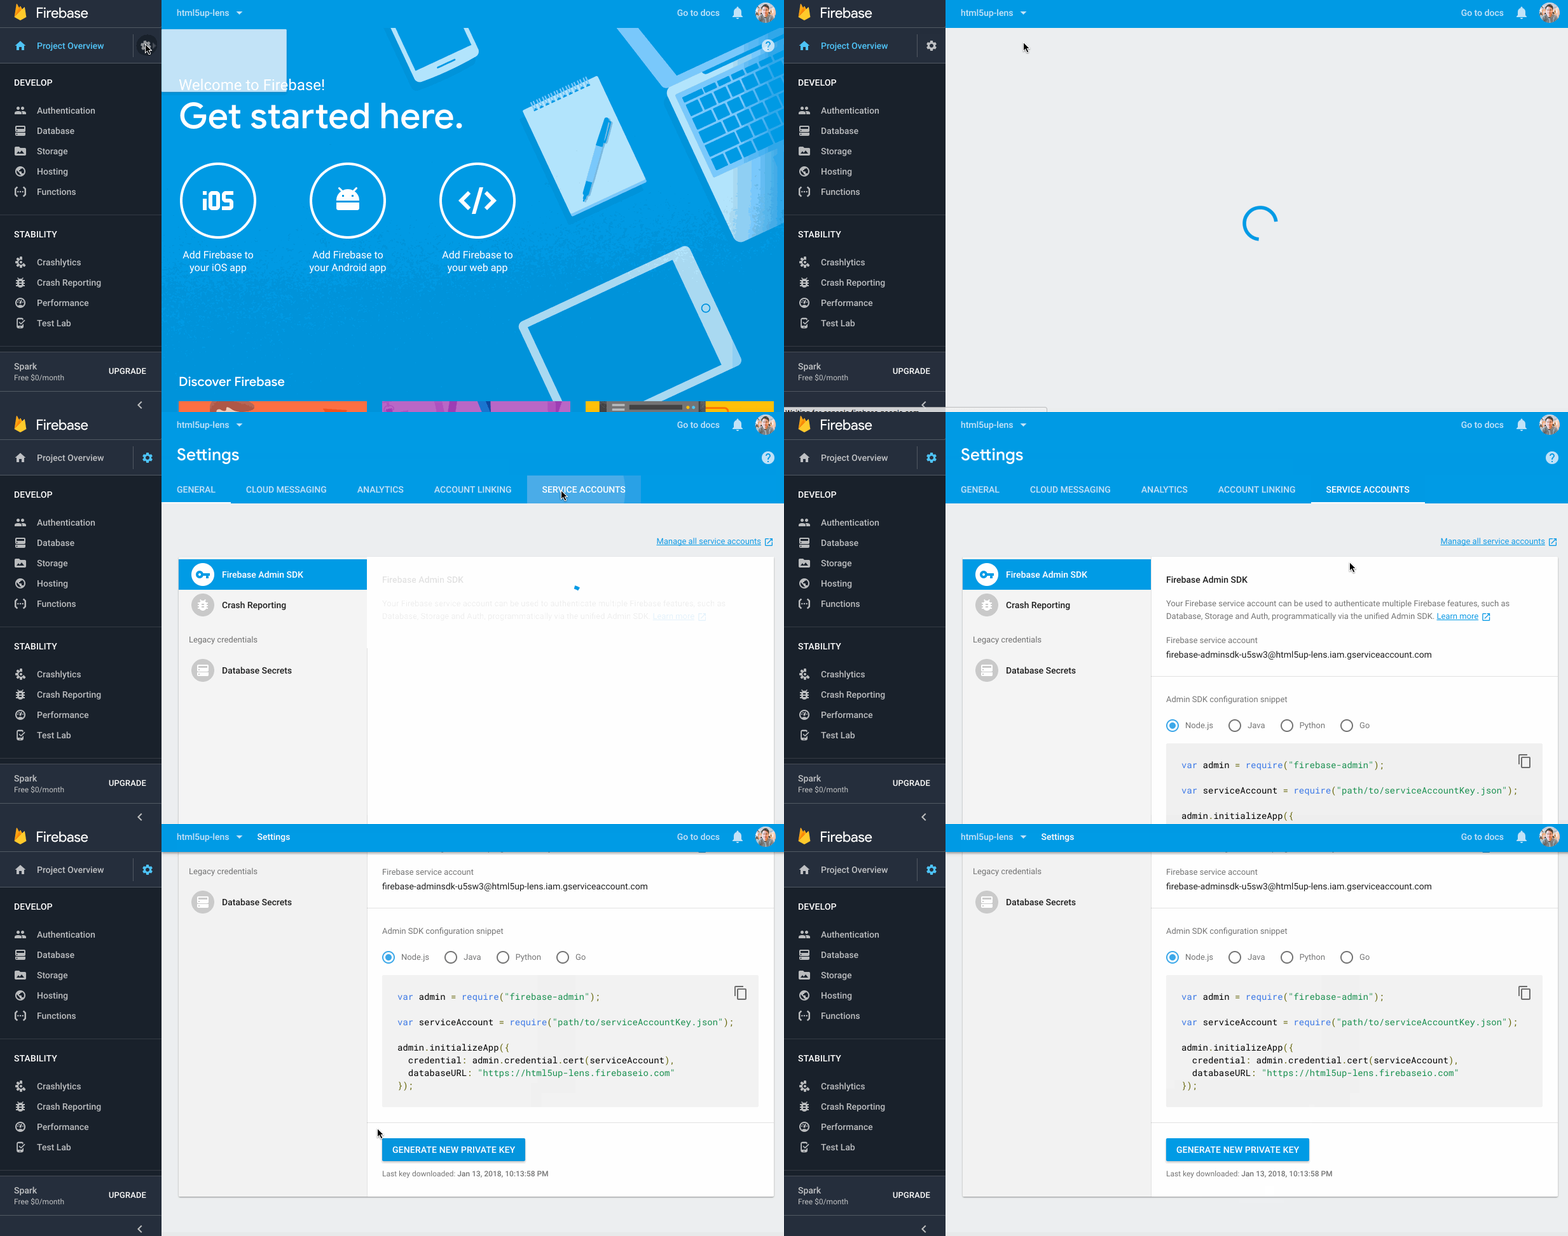
設定好 canner.schema.js 後,下載 firebase 所提供的私密金鑰並將檔名更改成 [projectID].json 放置在 cert 資料夾中 。
私密金鑰可以在 https://console.firebase.google.com/project/[PROJECT_NAME]/settings/serviceaccounts/adminsdk 找到。

3. 上傳 schema 和資料
上傳 schema 時用:
canner schema:deploy輸入資料時:
canner data:import將 canner.data.js 上傳到 Firebase,只限於 Firebase 的資料與 canner.data.js 毫無重複時才會上傳,若要覆蓋資料則使用 canner data:import -d, --dropFirst 進行上傳,看更多資訊